How to create the 3D View (Dollhouse)?
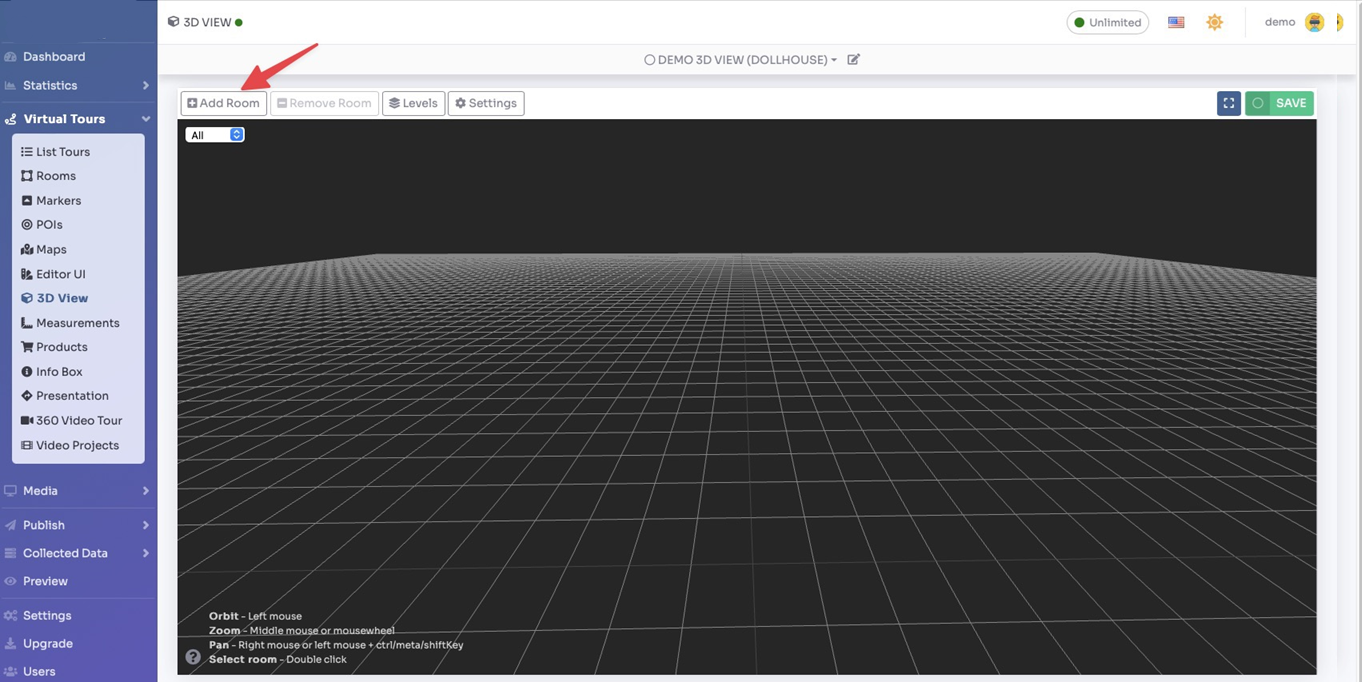
Select Render Walk → 3D View from the side menu.
You can freely navigate this 3D view:
- Click and drag to rotate
- Shift click or right click and drag to move
- Scroll to zoom
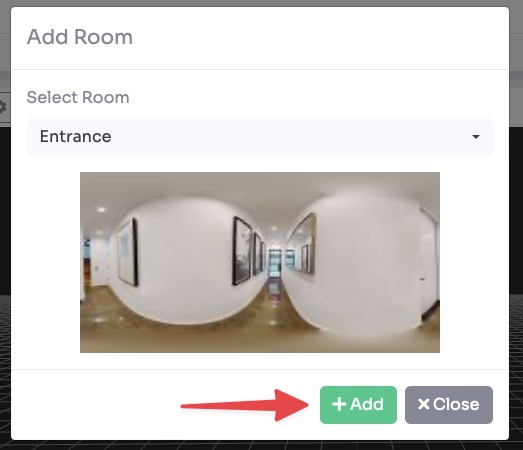
Click “+ Add room” in the top-left corner, then you can select any of your added rooms in the current tour.
Select the room you want to add and click the “+ Add” button.
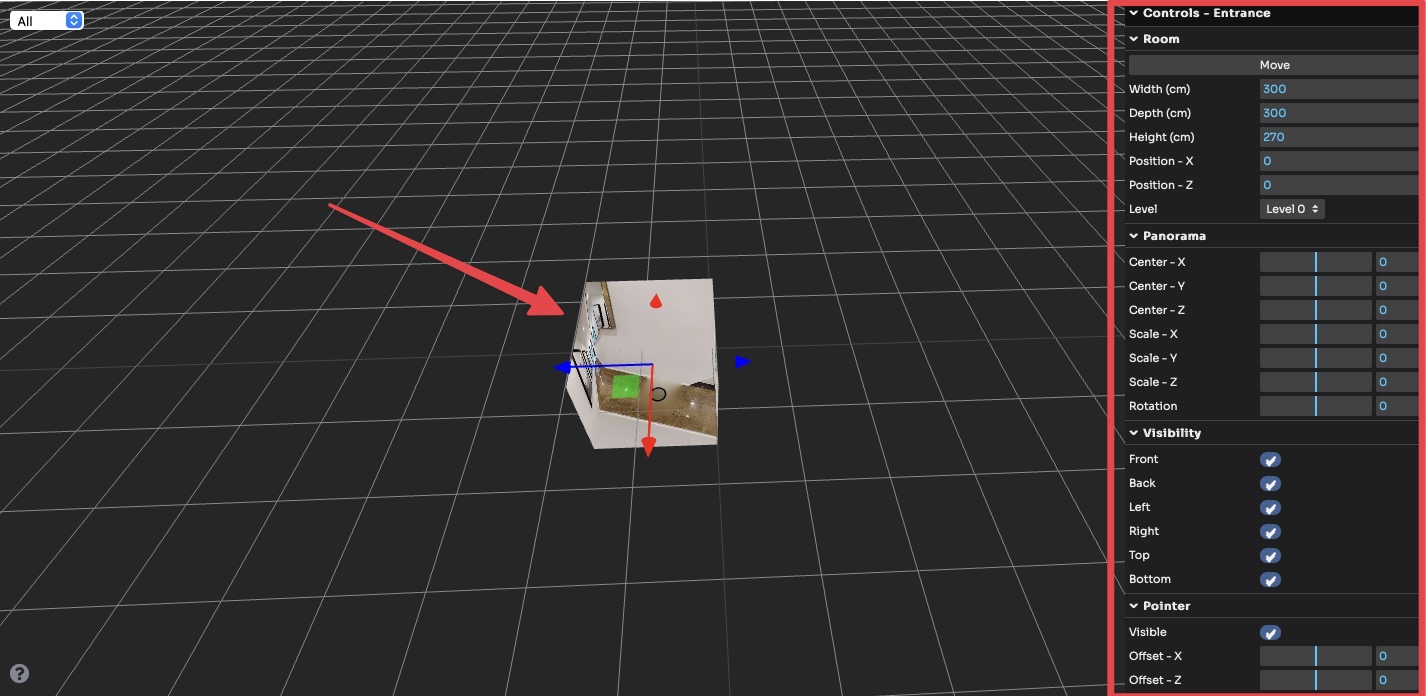
After you've added your room you can modify it by changing its parameters:
- Switch between Move / Scale — you can edit size and position of the room manually with the mouse or input values in the side menu
- Change the Level of each room
- In the Panorama section you can modify the centerpoint of the room as well as the scale of the texture in each direction
- Choose wall Visibility
- Modify position and visibility of the Pointer
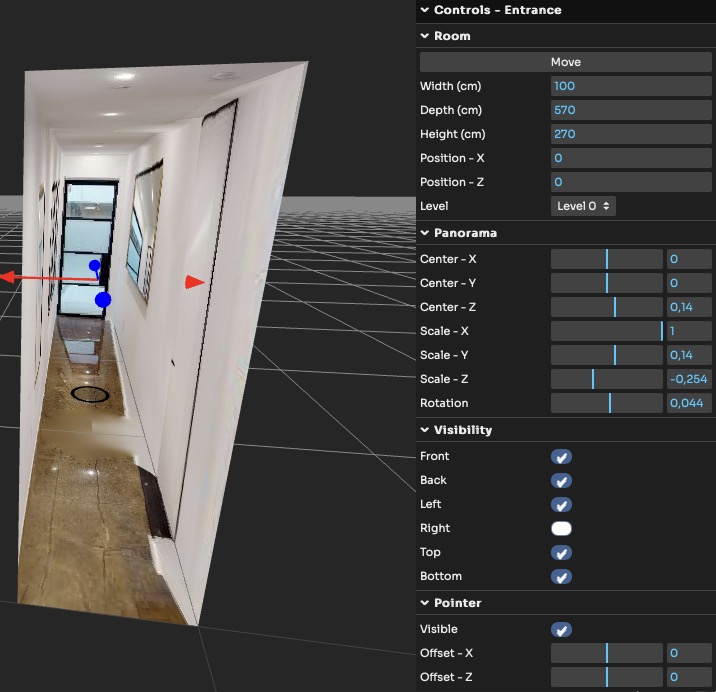
After changing all the parameters the result of the room is as follows:
Next you can:
- Add next room — repeat the process described above. Next rooms will be added next to the first placed room; to switch between editing rooms double click on them.
- Remove a room — removes the focused room.
- Levels — change each Level name and height.
- Settings — change action and visual options for the 3D view.

The settings you can change are as follows:
- Zoom in (ms) — Zoom speed when switching from normal to 3D view
- Zoom out (ms) — Zoom speed when switching from 3D to normal view
- Point Color — Main — Color of the pointer circles inside the rooms
- Point Color — Active — Color of the pointer circle of the active room
- Background Color / Opacity — Background color and transparency
- Autorotate Speed — Automatic rotational speed
- Autorotate Inactivity (s) — After the set time the 3D view will rotate automatically
- Room / Levels — Measures — Specify if meters or inches

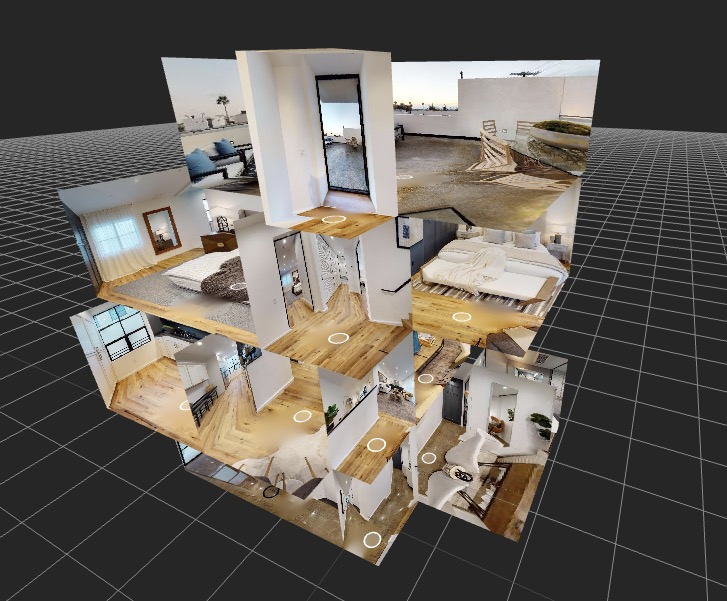
After fixing all the rooms and settings the result will be this:
Don't forget to save your changes by clicking Save in the top-right corner.
Now you need to activate the view inside your tour.
Select Render Walk → Editor UI from the side menu.
Click on the 3D View icon and set Show as Visible.
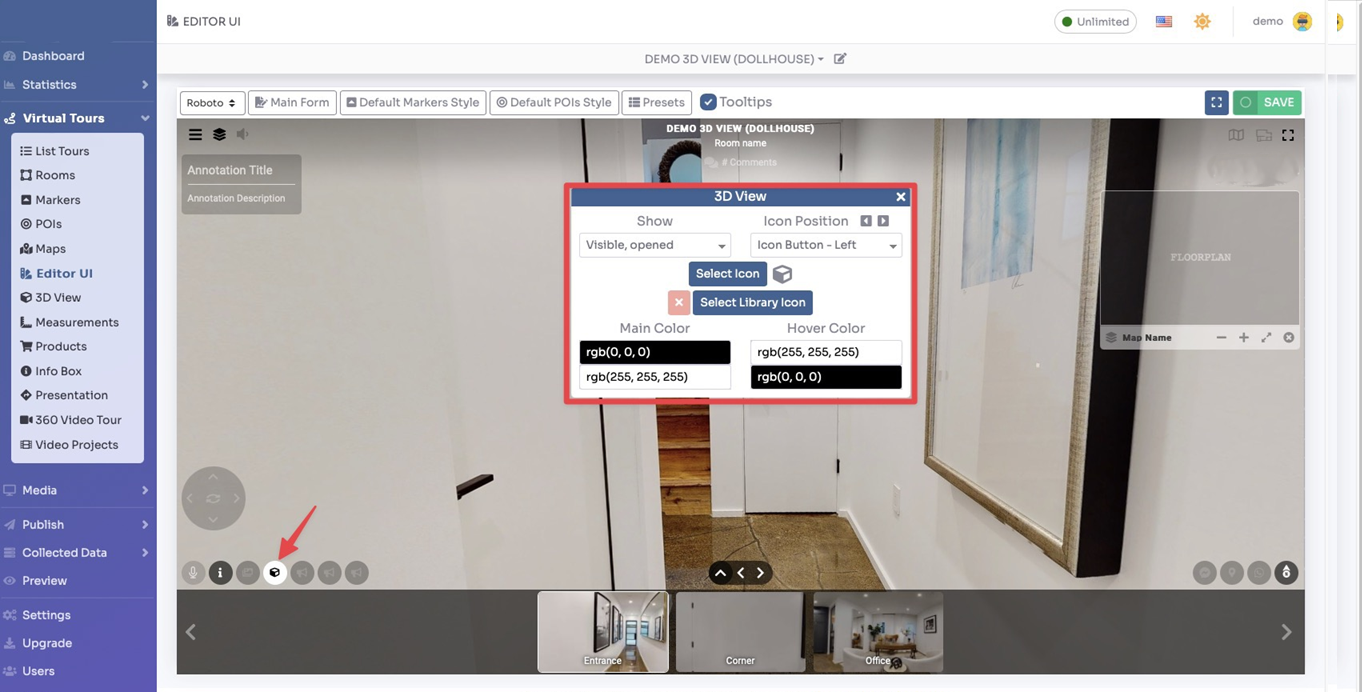
Click Save on top right corner of the page.