How to use Custom 3D Model in 3D View?
If you already have a 3D model to use as a 3D view, you can load it instead of creating one from scratch.
Select Render Walk → 3D View from the side menu.
Click on “Use Custom 3D Model”.
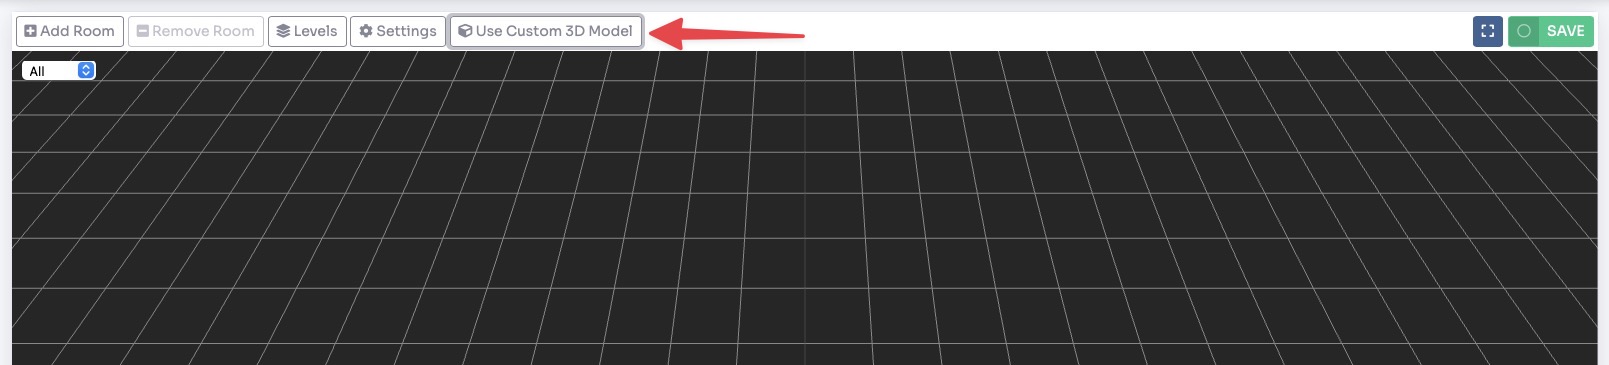
Upload the GLB file of the 3D model you want to use as the 3D view.
Add pointers to 3D Model
Open the GLB file with Blender.
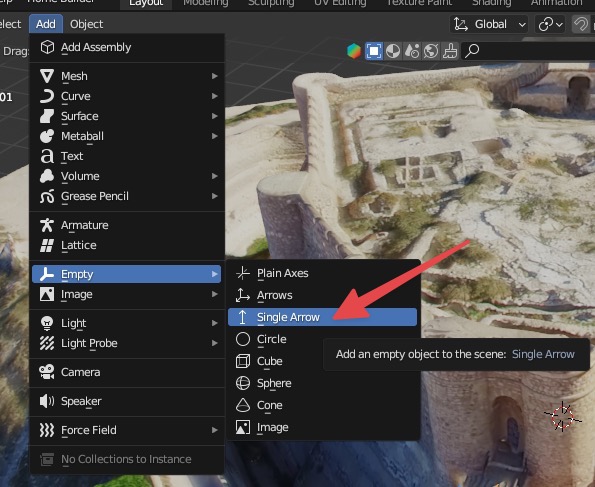
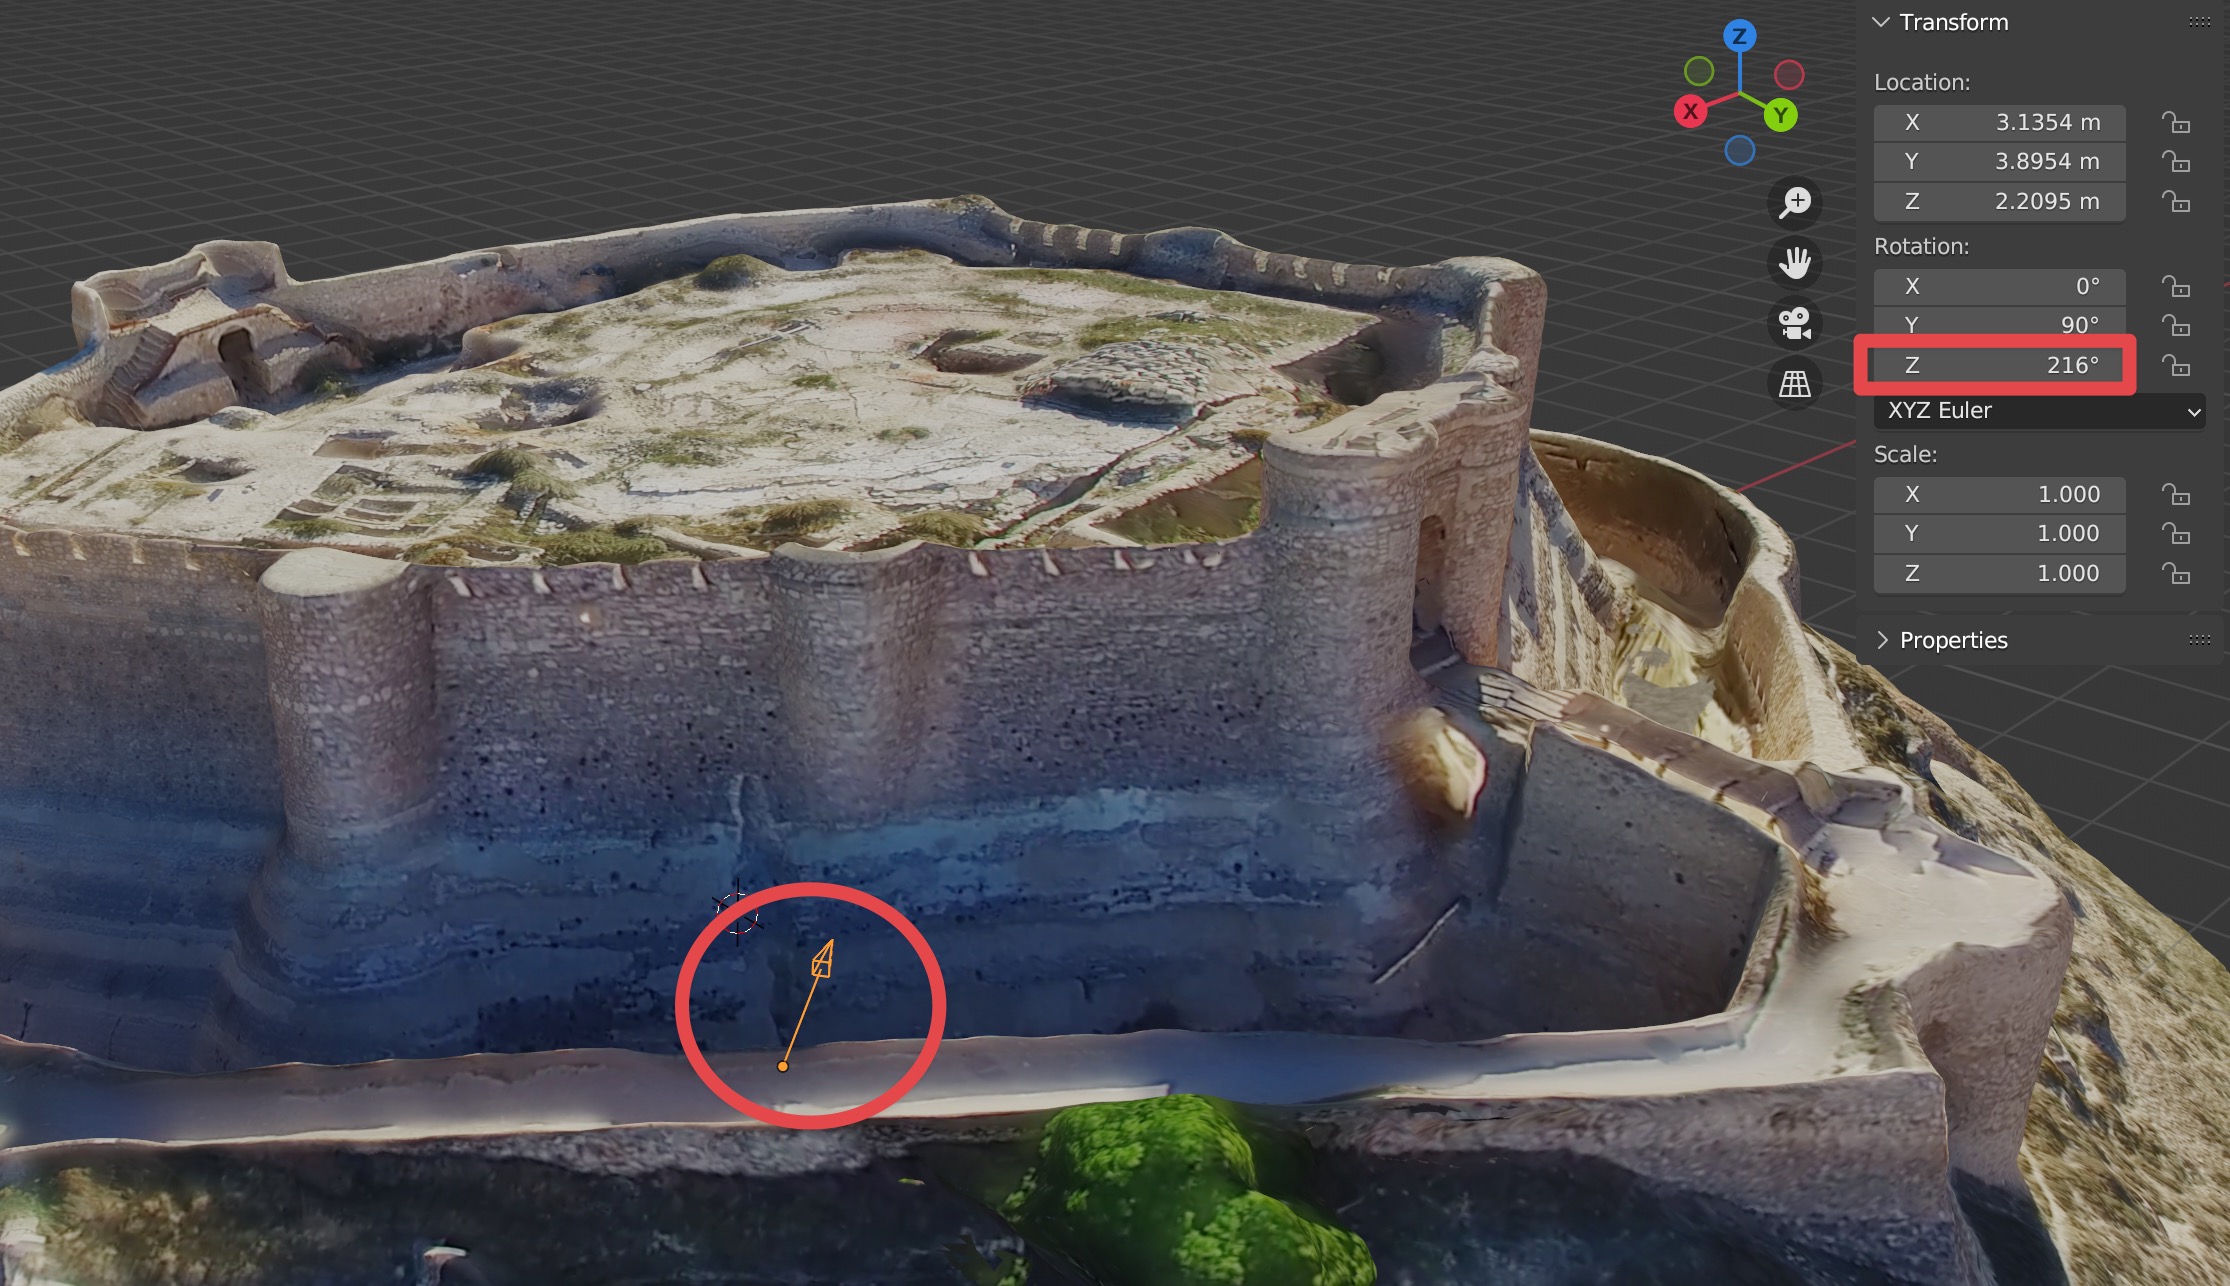
For each Room you want to show inside your 3D model, add an Empty Single Arrow object and position it correctly into the scene.
Set its rotation values to X: 0, Y: 90, Z: the direction from where the photo was taken with yaw set to 0 (the center of the panorama).
Within the custom properties of this object, create one of type string called id_room and set the ID of the room in it.
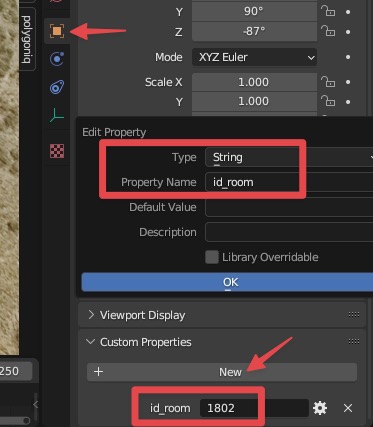
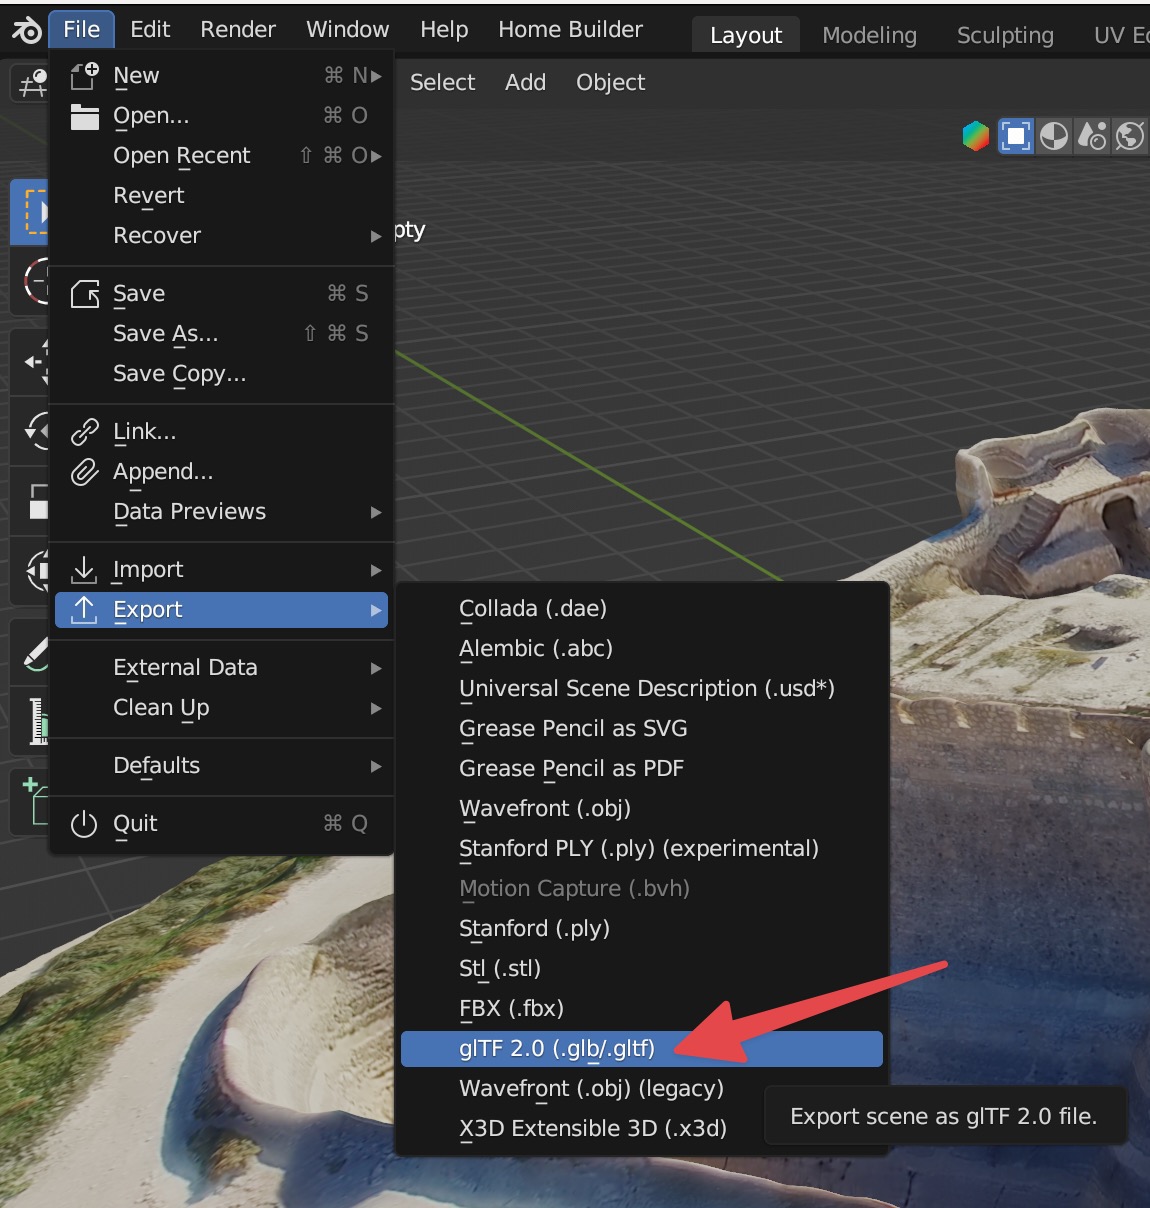
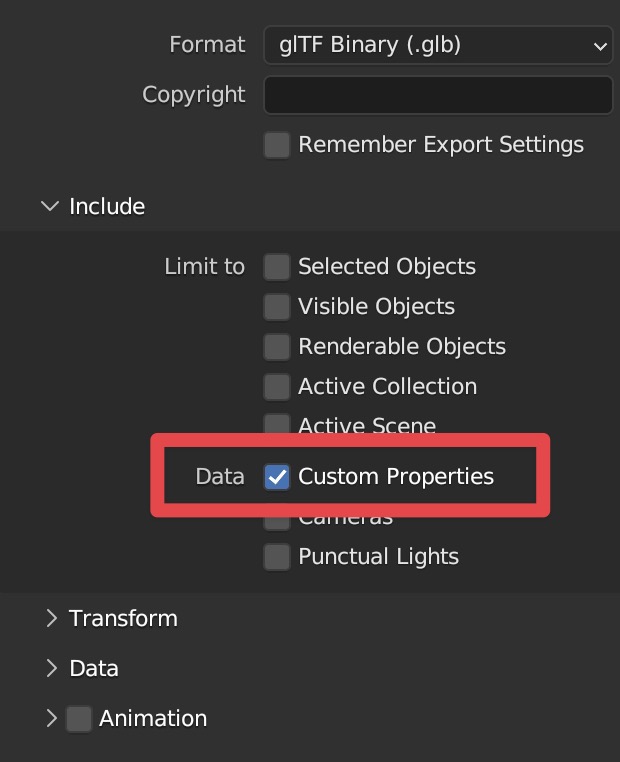
Export the GLB file, selecting in the settings to include the custom properties.